This page is the documentation page for VA Claim Helper (VCH). If the documentation is out of date, or is missing some information, please contact us.
Topics
- Case List
- Create a Case
- Fill in Veteran and Claimant Information
- Intake Form
- Fill a Form or Packet
- Documents
- Send Documents to the VA
- C-File AI Analysis
- Notes
- Tasks
- Billing
- Veteran Representative Configuration
Case List
When you first login to VA Claim Helper (VCH), you’ll notice a screen with a list similar to that of a spreadsheet. This is the case list.
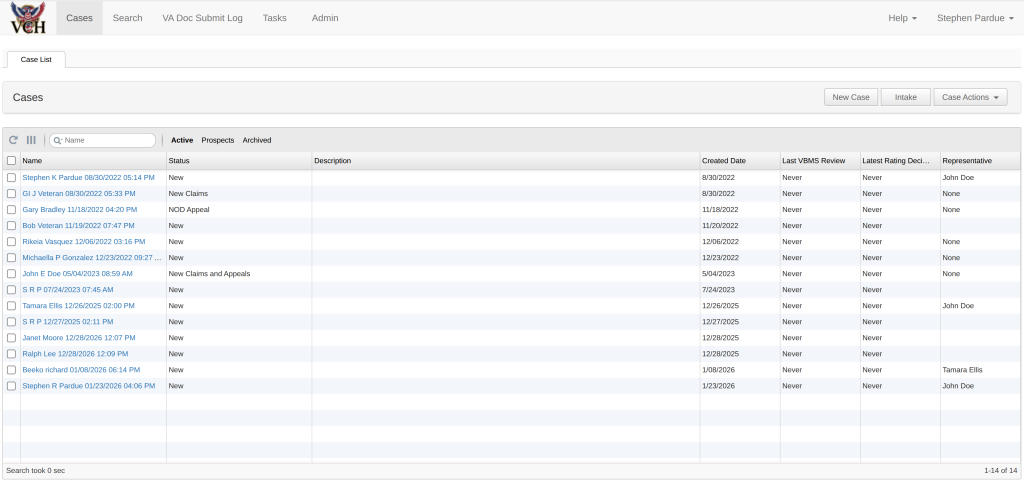
The case list contains all the cases in the database, expect the archived cases.
Archived cases are a “safe” delete and allow you to move finished or accidentally created cases out of view. To archive a case, click on the radio button next to a case and press “Archive Case”.
Cases can be searched and sorted using the case list, similar to the functionality of a spreadsheet.
If you are logging into a fresh install, no cases will exist so you’ll need to create a case. However, if cases do exist, click on the blue text name of a case and it will open the selected case in a new tab.
Create a case
There are two ways to create a case.
- A case is created by a staff member.
- A client fills out the intake form.
This guide will focus on the first way — a case being created by a staff member through the staff user interface.
Click the “New Case” Button. A dialog will pop up asking the case name.
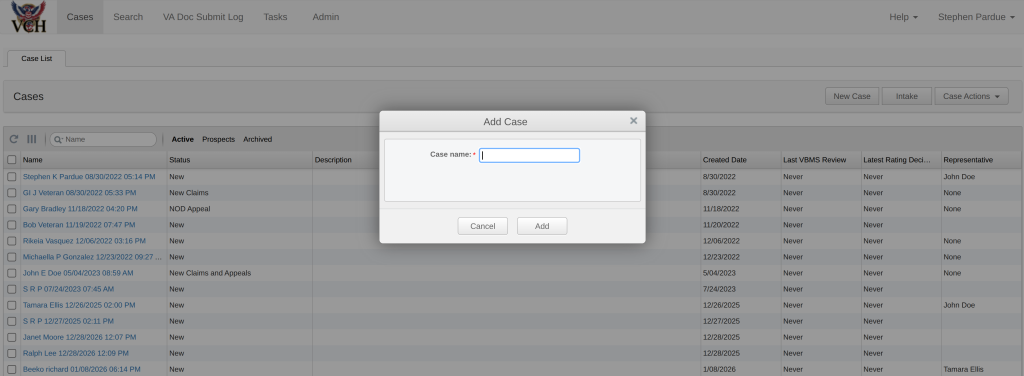
Once you click “Add”, the case will be created and it will appear in a new window.
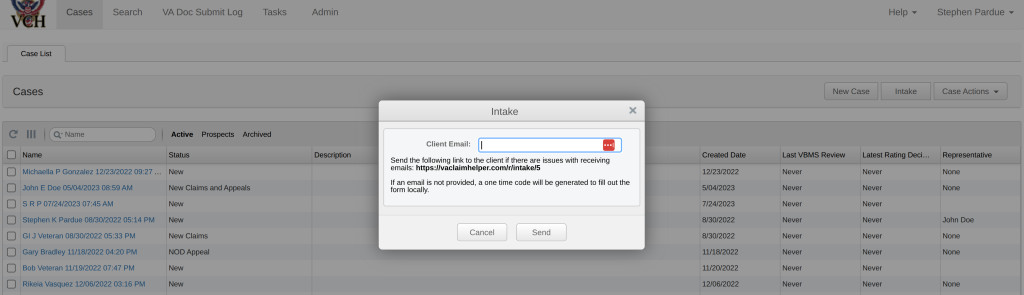
Intake Form

The intake form lets clients remotely fill out their information that is then entered into VCH. This eliminates the need for mailing/faxing a physical piece of paper.
The intake form also collects claimants signatures which are used in standard VA forms.
In addition to remotely filling out the form, the intake form can be locally filled out on a tablet or laptop, and the information will be entered into VCH.
The intake form is designed for mobile browsers (so cell phones, and tablets), but it also works on laptops or PCs.
To send the intake form to a client follow these steps:
- Login to VCH
- Click the “Intake”.
- Input the client’s email and click Send. Alternatively you can send them the URL displayed on the dialog. It is recommended you put this link on your website because it never changes.
Form Filling
VCH takes client and firm data and fills it into standard VA and Government Forms.
For the full list of forms and packets supported by VCH, please visit here.
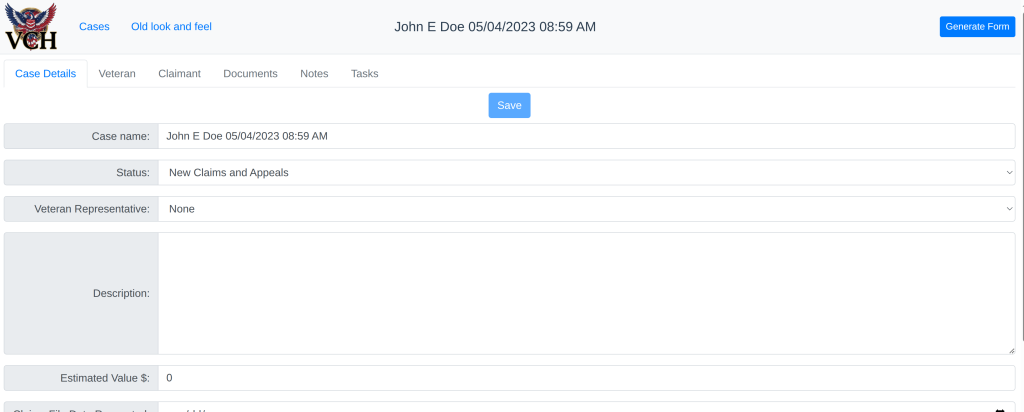
To generate a form or packet, follow these steps:
- Login to VCH.
- Navigate to a case.
- Select a Veteran Representative if one is not already selected.
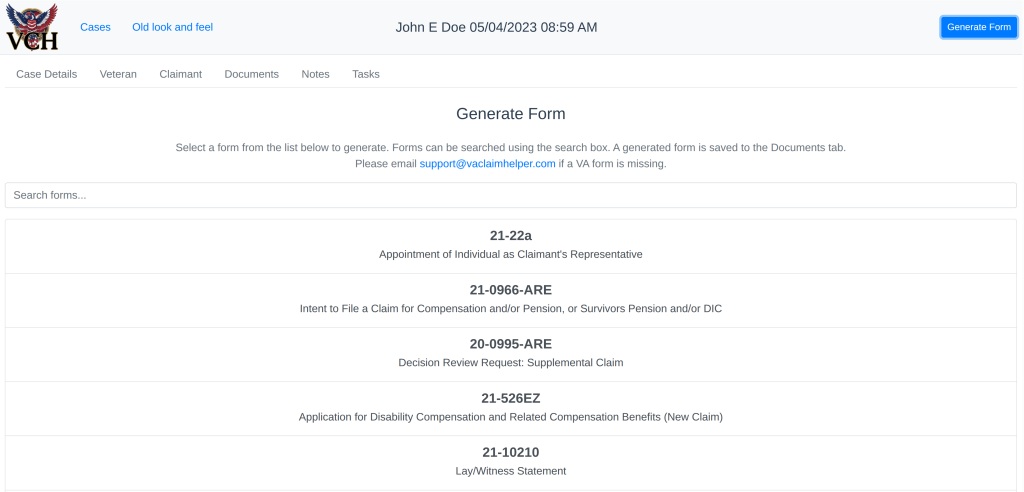
- Click “Generate Form”
- Select the form you want to generate.
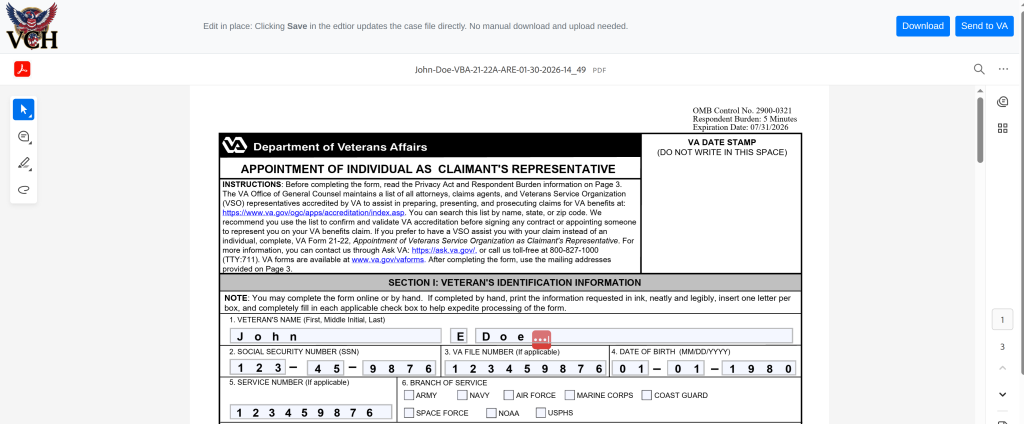
- View the form and make edits.
Fill in Veteran and Claimant Information
If you did not use the intake form to fill out the client information, you can manually enter it into the VCH staff interface.
In addition, if you need to make changes to the client information, you can change it using the following steps.
- Login to VCH.
- Open a case.
- To fill in veteran information click “Veteran”, fill in the information, and click “Save”. The Veteran Details tab contains most of the information about a case. Be sure to check out all the tabs.
- To fill in claimant information click “Claimant”, fill in the information, and then click “Save”. Claimants contains a lot less information than the veteran tab. The most important detail to consider is the “Veteran Relationship” to the veteran, which can be changed on this tab.

Documents
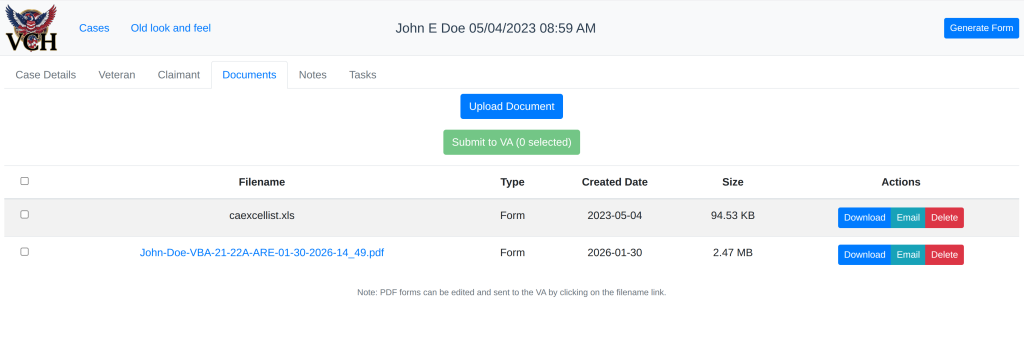
VCH allows for documents, or files, to be associated with a case. You can upload, download, and view documents.
To access the documents of a case, navigate to the case, and click the “Documents” tab.
Send Documents to the VA
VCH can directly submit benefits documents to the VA. This is as opposed to sending the documents via fax or mail.
Currently, only PDFs are supported.
To submit a document to the VA, please go to a case’s Document tab. Select the PDF you want to submit. Then click ‘Send to VA’. The document will then be electronically sent to the VA.
You can check the status of the submission by looking at the “VA Submission Status” table in an individual case or clicking the “VA Doc Submit Log” link at the top of the case list page.
Email alerts are sent to the user who submitted a document when there is an error with the document or if the document has been in a pending state for more than 15 days. In other words, if it has taken 15 or more days for the document to reach VBMS.
C-File AI Analysis
VCH can search through a veteran’s C-File and find potential claims.
- Upload the Veteran’s C-File (as a zip file or PDF) to in the documents page of a veterans case.
- A veteran’s C-File can be retrieved using E-Folder Express.
- While on the VA Network, click VA Intranet Links on the cases page of VCH and then click “E-Folder Express – C-File”
- Download the veteran’s C-File and then upload it to VCH under their case.
- Click “C-File AI Analysis” on the documents row once uploaded.
- Click “Start Analysis” on the next page.
- This process may take some time, especially for larger C-Files. Once it is complete click “View Report”
Notes
VCH has the ability to write notes for a specific case.
To access the notes of a case, navigate to a case, and click the “Notes” tab.

Tasks
A task in VCH is a way to organize work. A task has an assignee, an associated case, a due date, a name, and a description.
A user in VCH can assign tasks to another user. An email is sent to assignee on creation, and to the assigner when a task is complete.
To create a task, navigate to a case and click the ‘Tasks’ sub-tab. Here you will see a list of all tasks that are associated with the selected case. Click ‘Add’ and fill out the required information.
Once the task is created, an email will be sent to the assignee. They can view and edit the assigned task by clicking the ‘Tasks’ tab at the top of the app, and clicking the recently created task. The ‘Tasks’ tab contains a sub-tab with all the tasks assigned to the user, and another sub-tab with tasks they assigned to other users.
Billing
To add or update your credit card information, please click Admin -> Billing as seen in the screenshot below.

Veteran Representative Configuration
Veteran Represenatives can be configured to autopopulate their basic information in the standard VA forms. Futhermore, e-signatures can be uploaded as a transparent PNG image. To do this please go to Admin => Veteran Representatives.